Photo Booth (Part 8): Post production
Image optimisation, Animated thumbnails, Upload to Dropbox, and Generating a website.
Post-production Overview
Before I get into the detail I’d just like to say a quick thank you to everyone who’s followed along with all the steps thus far. Also a thanks to those who waited so patiently for this post to come out.
It’s been a journey to get this working just right (so I hope you like it!).
Introducing: The “Photo Processing” application
In parts 1 through 7, we built a photo booth that is able to save photos and store them on the Raspberry Pi’s SD card.
In this, part 8, we’ll be looking to achieve the following:
- Write a new “photo processing” application, that we can run alongside our “photo booth” application.
- Our photo processing application will be configured to:
- improve image brightness,
- apply some image compression,
- create animated gifs,
- create a “photo strip” layout,
- (and if you’re keen to do some further coding, you can add even more functionality if you like)
 .
.
- Upload our images to Dropbox.
Why a separate application?
I wanted a photo uploading solution that gives people the flexibility to choose how their photos get processed, published, shared;
- Not everyone will want to publish their photo booth online.
- Not everyone will want to publish their photos in the same way.
For this reason, my “photo publishing” is going to be a separate application which sits adjacent to the photo booth application.
The applications can either be run simultaneously (Photos will be captured, and uploaded, during the photo booth event), or at different times (i.e. “Photo booth” application can be run during a daytime event and the “Photo processing” application can be run afterwards). The latter option might be more suitable if you don’t have internet access available.
When the photo publishing application is running, it will routinely check our photo directory to determine if any new photos have been saved, and will then execute the applicable logic.
Installing and running the app
Step 1 : Install Pre-requisisites
Let’s install some additional apps onto our Raspberry Pi to help us with the tasks I’ve listed above.
1.1 : Installing ImageMagick
Imagemagick will help us fine tune our images (compression; brightness; layouts …etc.).
We install ImageMagick from our Rasberry Pi’s terminal with the following commands:
    sudo apt-get update
    sudo apt-get install imagemagick libmagickcore-dev libmagickwand-dev libmagic-dev build-essential -y
    cd
    wget https://www.imagemagick.org/download/ImageMagick.tar.gz
    tar xvzf ImageMagick.tar.gz
    cd ImageMagick-*
    ./configure
    make clean
    make
    sudo make install
    sudo ldconfig /usr/local/lib
We can confirm that the application installed correctly, by entering magick -version:

1.2 : Installing the Dropbox Python SDK
We’re also going to start interacting with Dropbox from within our Python application.
In order to do that we need to install the Dropbox Python SDK, also from the terminal:
    # This python library will help us upload our images to Dropbox:
    pip install dropbox

    # Or, if using Python 3 instead:
    python3 -m pip install dropbox
1.3 : Installing YAML parser
The configuration file for our application is written using the YAML language.
To assist Python in being able to interpret this file, we are also going to ensure that the our YAML-parsing library is installed:
    # This python library will help us read our config file (written in YAML)
    pip install ruamel.yaml

    # Or, if using Python 3 instead:
    python3 -m pip install ruamel.yaml
Step 2 : Installing the “Photo processing” application
As of version 3.0 of the Photo Booth (May 2018), the two applications (i.e. the ‘Photo Booth’ and the ‘Photo Processor’) are packaged together in the one download.
Step 3 : Run the application
    cd ~/photo-booth
    python photo-processor.py
Notice that our application now appears to be watching for files:

Also notice that we now have a set of additional folders created in our project directory:
Step 4 : Testing the application
Now, as an experiment we can drop a set of 4 photos into /photos-IN:
![Placing images into [photos-IN] directory Placing images into [photos-IN] directory](/images/dist/2018/placing_photos_into_photos-IN_1-700w.png)
Our application will start spitting out information to us:

Finally, if we check our /photos-DONE folder, we can see a number of things have happened to our photos:
- Each of our 4 images has been reduced in file size. The files are now 1/4 their previous size, without a noticable drop in quality.
- The 4 images have also each been “auto-levelled” to help optimise their brightness / contrast (Note: this may only be noticable in poor lighting conditions).
- We now have an animated “thumbnail” image, which can great for posting on the web.
- We have a couple of “photo strip” layouts (1x4) and (2x2); which may be useful if we want to print our images.

Nice one!
Step 5 : Configuring our application
A configuration file gets created the 1st time the application is run.
If we close our ‘photo processing’ application (via Ctrl + \) then we can have a look at the configuration file photo-processor-config.yaml.
All of the images that are output by the application can be enabled/disabled/customised, within this file:
    #photo-processor-config.yaml
    #---------------------------

    # Photo Processor Config:

    # Images to Output
    "OUTPUT_OPTIMISED_STILLS"    : True
    "OUTPUT_ANIMATED_THUMBNAILS" : True
    "OUTPUT_LAYOUTS"             : True

    # Directories
    "INPUT_DIRECTORY"      : "photos-IN"          # Files will be taken from here.
    "PROCESSING_DIRECTORY" : "photos-PROCESSING"  # Files will temporarily occupy this folder, whilst being processed.
    "OUTPUT_DIRECTORY"     : "photos-DONE"        # Files will be placed in this folder, once all processing is complete.

    # Image compression
    "IMAGE_QUALITY" : 90

    #Thumbnails config
    "THUMBNAILS_IMAGE_QUALITY" : 50
    "THUMBNAILS_SIZE"          : 50

    # List of print layouts to produce (1 column, 2 column)
    "LAYOUTS" :
    1:
        "TILE" : "1x"
        "SIZE" : "1920x1152"
        "MARGIN" : "20"
    2:
        "TILE" : "2x"
        "SIZE" : "1920x1152"
        "MARGIN" : "20"

    # Dropbox
    "DROPBOX_ENABLED" : False
    "DROPBOX_TOKEN"   : ""
Step 6 : Dropbox Integration
By default ‘Dropbox Upload’ is disabled.
In order to enable Dropbox uploads we need to do some additional setup which I’ve described below.
6.1 : Get a Dropbox Account
Dropbox is an online service which helps you to “store, share, and securely access files”.
If you don’t have a Dropbox Account, you can signup for a free account here (using this link will give you an extra 500Mb of storage space).
6.2 : Create a Dropbox App within the Developer page
After signing into your account, you need to navigate to the Developer section of the Dropbox website, and create an ‘Dropbox app’.
To do this:
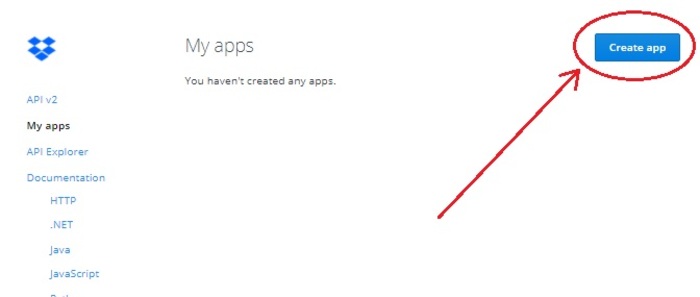
- Go to the Dropbox App Console page.
Click the “Create app” button:
Specify:
- ‘Dropbox API’
- ‘App folder’
- A name for your app (
pi-photo-boothor whatever else you would like to use )
)
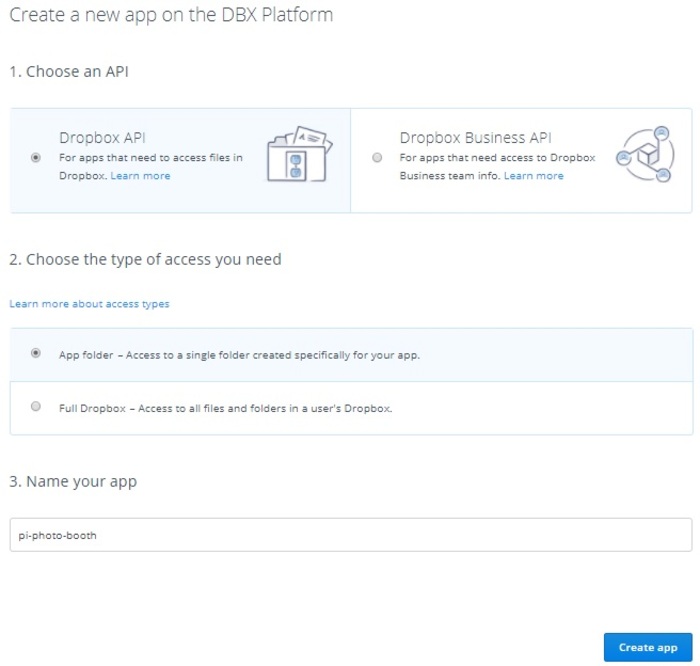
Click “Create app”.
6.3 : Generate a API token
After recording the details of our “app” with Dropbox, we also need to create a “token”.
The token is similar to a password. It allows our Raspberry Pi’s Photo booth app to talk to the “app” we created within Dropbox.
To generate a token, we need to click the “Generate” button, per the illustration below:
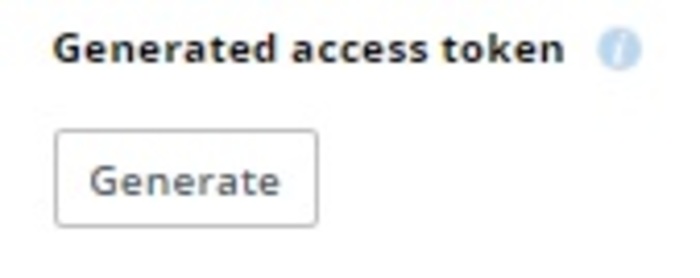
Once the token is generated, you need to copy it…

… and paste the token into our configuration file (photo-processor-config.yaml):
    # Dropbox
    "DROPBOX_ENABLED" : True
    "DROPBOX_TOKEN"   : "qwertyuiopAAA_This_Is_Not_My_Real_Token_But_You_Get_The_Idea_AAAplkdfnvlskdmf"
Save and close the configuration file.
6.4 : Test our changes
Start up the Photo Processor app again.
Copy a set of photos from the photos directory into the photos-IN directory.
Now watch as the photos also get uploaded to Dropbox.
Step 7 : Completing the file pipeline
By default:
- Our photo booth application (
camera.py) saves all the photos it captures into a folder calledphotos. - Our Photo Processor application (
photo-processor.py) watches the folder calledphotos-IN. - We need to manually copy our photos from the
photosinto thephotos-INfolder.
If we want this manual step to be performed automatically, then we will make one more change to our photo-booth configuration file (camera-config.yaml):
    # Additional location(s) where images will be saved to (optional):
    "COPY_IMAGES_TO" : ["photos-IN"]
Notice that the ‘#’ character has been removed, which preceeded “COPY_IMAGES_TO”.
This will cause our images to be copied into the photos-IN directory (in addition to saving the raw images into our photos directory).
Step 8 : Updating our “Auto-start” script to also include the Photo Processor application.
We can update our autostart script, as follows.
This will ensure that both applications start automatically when we booth the Pi.
(This is, of course, optional).
- Update our a new text file;
sudo nano /etc/xdg/autostart/autostart_photo_processor.desktop- Populate the file with the following content:
[Desktop Entry]
Type=Application
Name=photo-processor.py
Comment=Raspberry Pi Photo Processor
NoDisplay=true
Exec=sudo python /home/pi/photo-booth/photo-processor.py
NotShowIn=GNOME;KDE;XFCE;
Name[en_US]=photo-processor.py- Save and exit the file (
Ctrl+X).
For more detail about autostart scripts, refer to the earlier discussion within part 6.
Step 9 (BONUS): Automatically posting images to social media and other sites
One of the great benefts of choosing Dropbox, is that is can be used in conjunction with ITTT. ITTT is a website that can be used to automate actions between different online platforms.
When a photo gets uploaded to Dropbox, when can use ITTT to trigger additional events such as:
- We send a tweet on Twitter
- We publish the photo on Tumbler
- We share the photo on Facebook
ITTT is super easy to use and you don’t need to write any code. Instead, ITTT provides a set of simple screens that are built around the phrase “If this then that”.
As an example, lets get our photo booth to start integrating with Twitter:
- Go to ITTT.com, and Login / Register for an account.
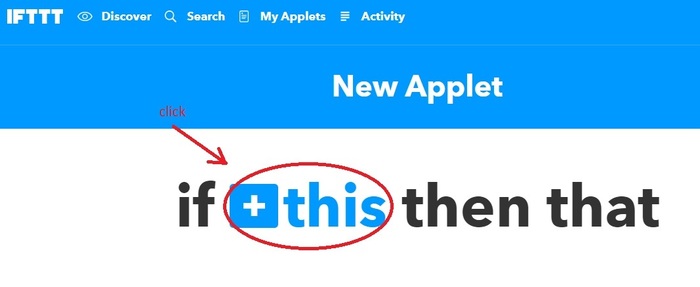
- Start a
New applet - Click on “If this”, to specify the condition under which our action will be triggered:
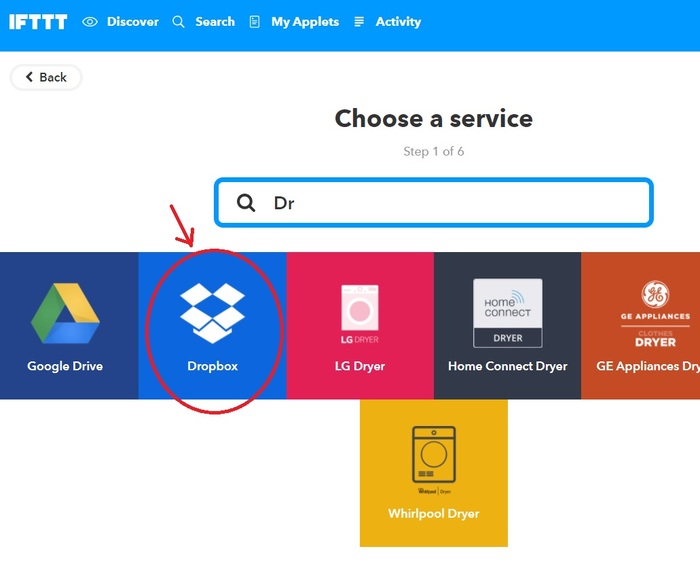
- Locate Dropbox:
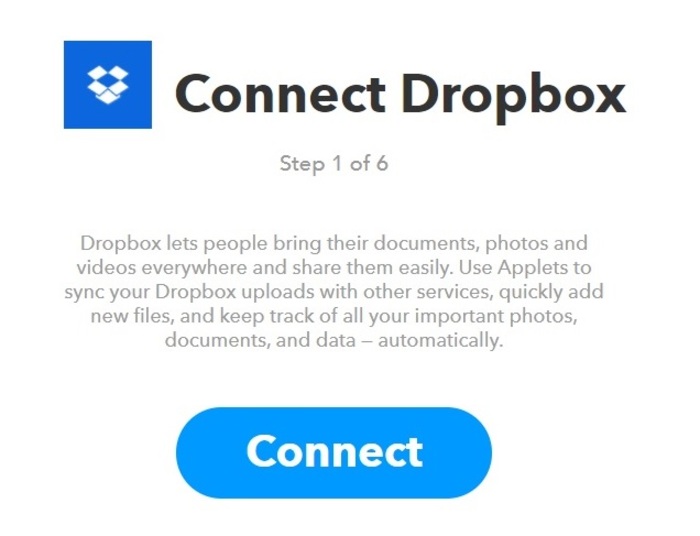
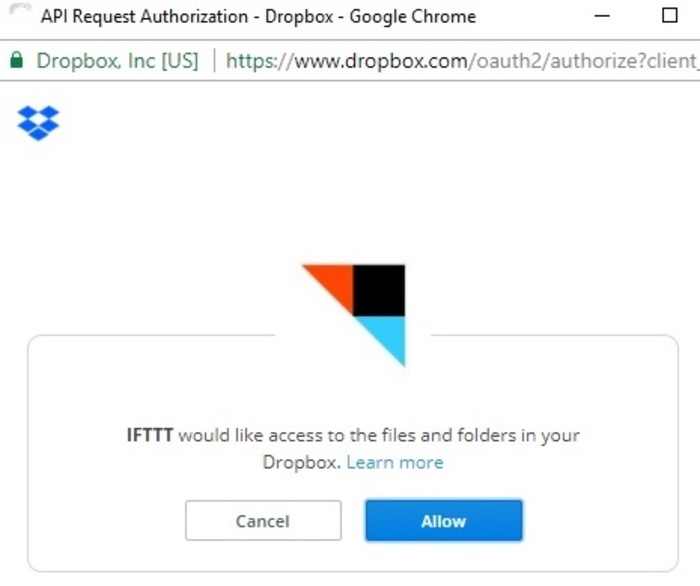
- Complete the steps of connecting your Dropbox account with ITTT:
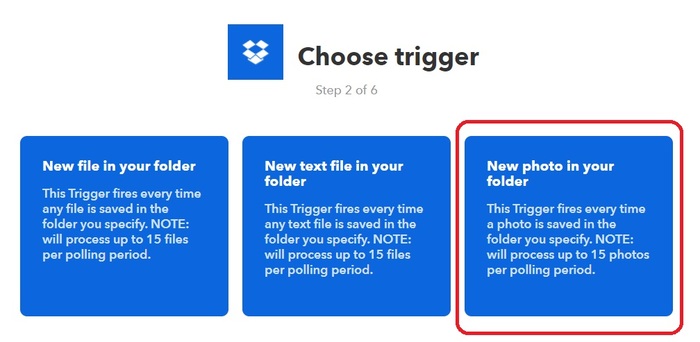
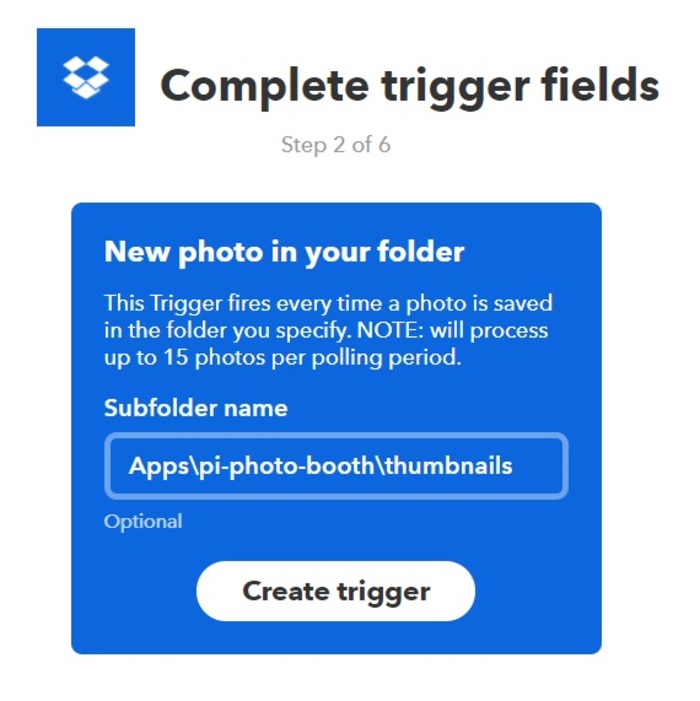
- Choose the trigger “New photo in your folder”
- Specify the Dropbox subfolder that ITTT will check for new images. This will be
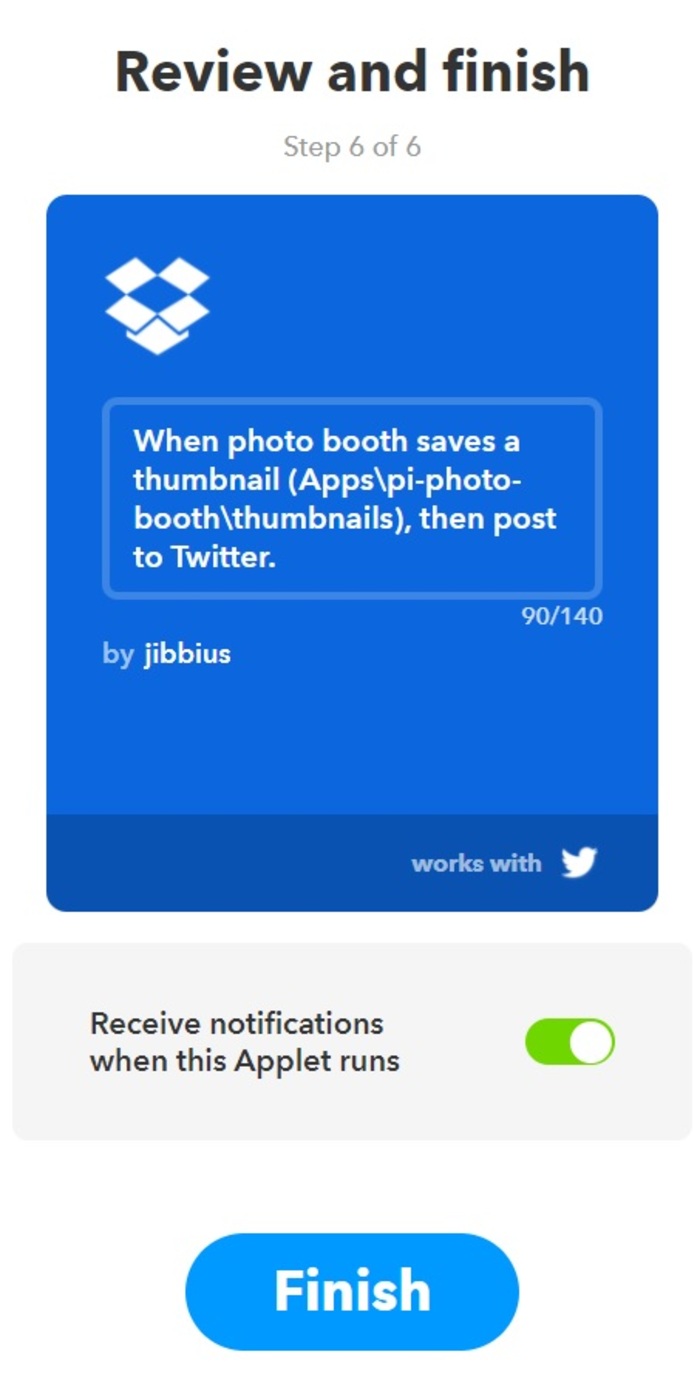
Apps\+ the name of your Dropbox app +\thumbnails:
- Click on “Then that”, to specify the action to be performed:
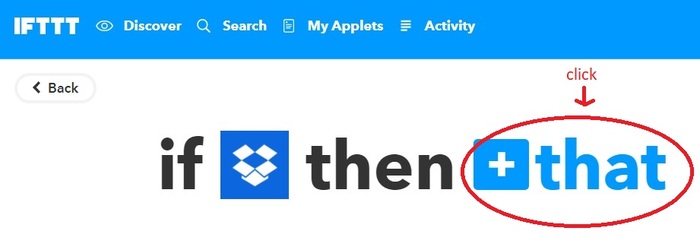
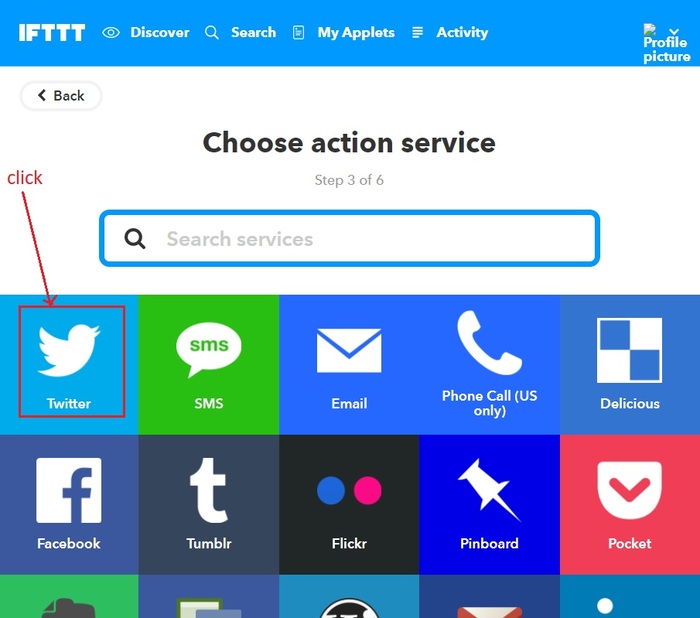
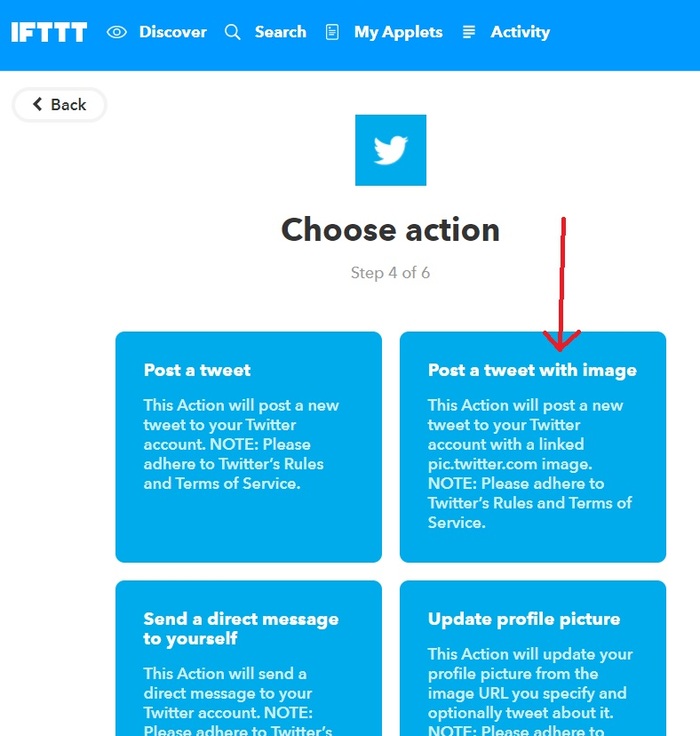
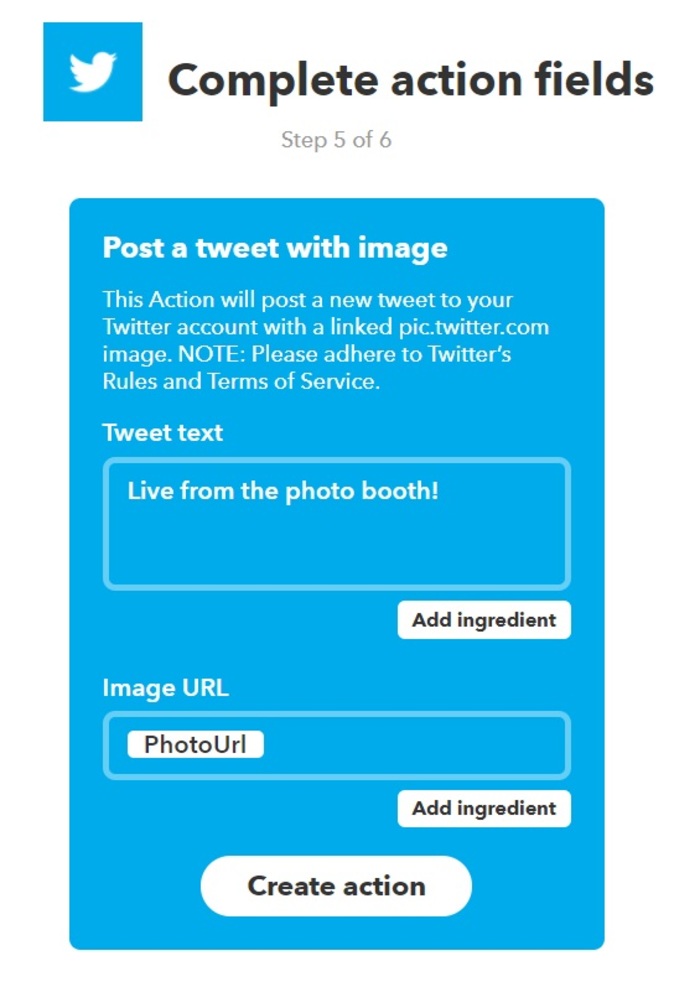
- Locate Twitter (or another service of your choosing), and complete the remaining details:
