Photo Booth (Part 6): Fine-tuning
Personalising the UI; Adding an autostart script; and more!
Overview of Part 6
In part 6 of this series we’ll look at some additional improvements we can make for the photo booth.
Personalised images
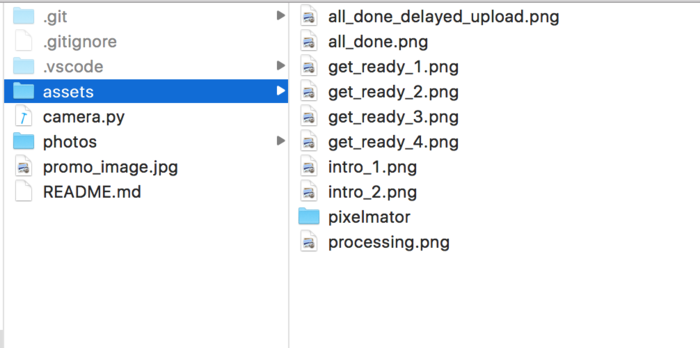
The assets directory contains a number of images.

These images are used as the different “screens” within the photo booth application.
You can enhance the photo booth experience for your guests by personalising these images;


Automatically launching the Photo Booth app when the Pi starts
At the moment we need to start the Photo Booth script manually after powering on the Raspberry Pi. Ideally, however, the script should be run automatically as soon as the Pi starts up.
To fix this:
- Create a new text file;
sudo nano /etc/xdg/autostart/autostart_photobooth.desktop- Populate the file with the following content:
[Desktop Entry]
Type=Application
Name=camera.py
Comment=Raspberry Pi Photo Booth
NoDisplay=false
Exec=sudo python /home/pi/photo-booth/camera.py
NotShowIn=GNOME;KDE;XFCE;
Name[en_US]= camera.py- Save and exit the file (
Ctrl+X).
Note: To later disable/re-enable this behaviour, you can simply move the file to a different location:
# Disable autostart, by moving the file into home directory instead
sudo mv /etc/xdg/autostart/autostart_photobooth.desktop ~/autostart_photobooth.desktop

# Re-enable autostart, by moving file back into autostart directory
sudo mv ~/autostart_photobooth.desktop /etc/xdg/autostart/autostart_photobooth.desktop
Optional Extras
Finally, here are some other ideas that you can add to your own photo booth.
(If you do implement any of these, be sure to let me know via the comments ![]() )
)
Real Time Clock (RTC) module
If your Pi photo booth has internet access, then the Pi’s clock will automatically be updated to the correct time upon connecting.
If you are planning to operate the photo booth without internet access, you should note that the clock of the Pi will be incorrect. The impact of this, is that the filenames given to your photos (which include a timestamp as part of the filename) will not be perfectly reliable.
You can choose to rectify this by installing a “Real-time clock” (RTC) module onto your Raspberry Pi. Typically, an RTC works by attaching a small battery to the Pi, which ensures that the clock remains powered after shut down.
You can pick-up this piece of hardware from a local electronic store, or online from your favourite electronics supplier.
Shutdown button
Turning off the Pi by simply cutting the power can have side effects, specifically: data loss. This is similar to removing a USB stick from your computer without using the “safely eject” menu.
If you find that any of your photos get “corrupted” (usually the last one the was saved), then installing a shutdown button is one method to correct this.
There are plenty of tutorials for doing this online and is a great feature to include.
My code actually includes an “Exit app” feature if you attach a button across GPIO pin 13 and ground (which can also be used to avoid corrupting images).
Saving photos to the cloud
Another method to prevent data loss is to backup your photos to the cloud.
Dropbox is a great (free) solution to this problem, and can be installed on a Raspberry Pi - albeit with some challenge.
We’ll be looking at this further in part 8, but there are some other ways to do this described here.
Next article
For the next article in this series, I’ll be talking about some tips for your photo booth’s debut, and ideally how to keep your big day “stress free”.
Subscribe to my blog to stay informed of my progress.